


About JavaScript
In OpenSesame you can create complex experiments using only the graphical user interface (GUI). But you will sometimes encounter situations in which the functionality provided by the GUI is insufficient. In these cases you can add JavaScript code to your experiment.
JavaScript is mostly intended for online experiments with OSWeb, although you can also run JavaScript on the desktop, provided that you use (the outdated) ECMA 5.1 syntax, as explained below. If you do not need to run your experiment online, it is generally easier to use Python instead of JavaScript.
Learning JavaScript
There are many JavaScript tutorials available online. One good resource is Code Academy:
JavaScript in the OpenSesame GUI
Inline_javascript items
In order to use JavaScript code you need to add an inline_javascript item to your experiment. After you have done this you will see something like Figure 1.
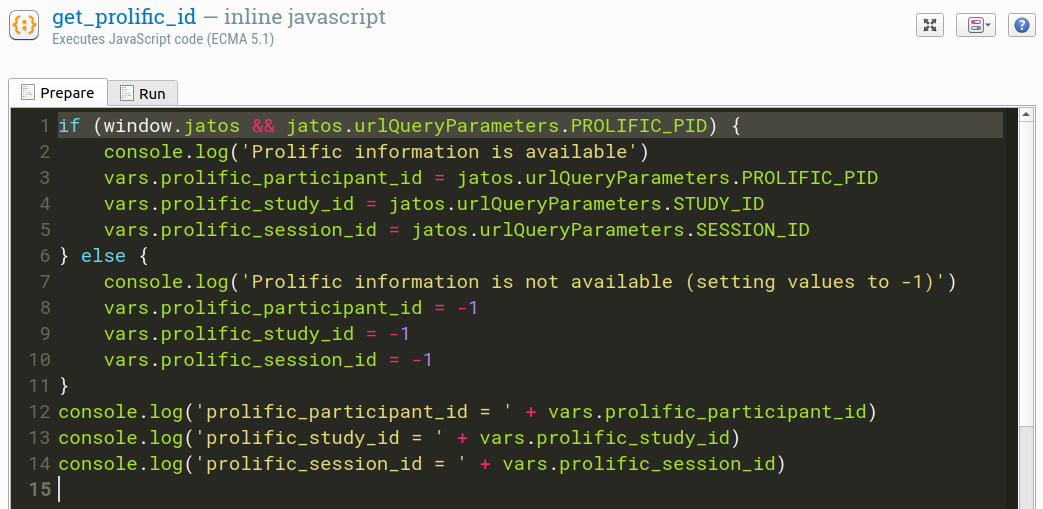
Figure 1. The inline_javascript item.
As you can see, the inline_javascript item consists of two tabs: one for the Prepare phase and one for the Run phase. The Prepare phase is executed first, to allow items to prepare for the time-critical run phase. It is good practice to construct Canvas objects during the Prepare phase, so that they can be presented without delay during the Run phase. But this is only convention; you can execute arbitrary JavaScript code during both phases.
For more information about the prepare-run strategy, see:
Important: If you declare a variable or function in one script, it won't automatically be available in another script, unless you attach it to the persistent object, as described below.
Printing output to the console
You can print to the console with the console.log() command:
console.log('This will appear in the console!')
When running on the desktop, the output will appear in the OpenSesame console (or: debug window). When running in a browser, the output will appear in the browser console.
Things to know
Versions of JavaScript: ECMA 5.1 and ECMA 6
The formal name of JavaScript is ECMASCRIPT, which exists in different versions. The latest version, ECMA 6 (or: ECMA 2015), has some useful features:
letandconstkeywords for variable definitions (in addition to the oldvarkeyword)for … of …loops that iterate over values (in addition to the oldfor … in …loops that iterate over indices)- Destructuring assignment, which allows you to assign the elements of an array to multiple variables at once.
ECMA 6 is supported by most modern browsers, which means that you can use these features when running an experiment in a browser.
// ECMA 6 (browser only)
const c = Canvas()
c.fixdot()
for (const [x, y] of xy_circle(8, 100)) {
    c.rect({x: x - 10, y: y - 10, w: 20, h: 20})
}
c.show()
However, due to a limitation of the js2py library, which is used by OpenSesame to run JavaScript on the desktop, you can only use ECMA 5.1 when running the experiment on the desktop (in addition to in a browser). This means that the script above becomes less elegant when you want to be able to run it on the desktop:
// ECMA 5.1 (browser + desktop)
var c = Canvas()
c.fixdot()
var points = xy_circle(8, 100)
for (var i in points) {
    var x = points[i][0]
    var y = points[i][1]
    c.rect({x: x - 10, y: y - 10, w: 20, h: 20})
}
c.show()
Common functions
New in OSWeb v1.4
Many common functions are directly available in an inline_javascript item. For example:
// `Canvas()` is a factory function that returns a `Canvas` object
var fixdotCanvas = Canvas()
if (sometimes()) {  // Sometimes the fixdot is green
    fixdotCanvas.fixdot({color: 'green'})
} else {  // Sometimes it is red
    fixdotCanvas.fixdot({color: 'red'})
}
fixdotCanvas.show()
For a list of common functions, see:
The persistent object: preserving objects across scripts
New in OSWeb v1.4
Each inline_javascript item is executed in its own workspace. This means—and this is different from Python inline_script items!—that you cannot use variables or functions that you've declared in one script in another script. As a workaround, you can attach variables or functions as properties to the persistent object, which serves as a container of things that you want to preserve across scripts.
This way you can construct a Canvas in one inline_javascript ...
persistent.myCanvas = Canvas()
persistent.myCanvas.fixdot()
.. and show it in another inline_javascript:
persistent.myCanvas.show()
The vars object: Access to experimental variables
You can access experimental variables through the vars object:
// Get an experimental variable
console.log('my_variable is: ' + vars.my_variable)
// Set an experimental variable
vars.my_variable = 'my_value'
The pool object: Access to the file pool
New in OSWeb v1.4
You access 'files' from the file pool through the pool object. The most obvious use of this is to parse CSV files, for example with experimental conditions, from the file pool using the csv-parse library (described in more detail below).
const conditions = csvParse(
    pool['attentional-capture-jobs.csv'].data,
    {columns: true}
)
for (const trial of conditions) {
    console.log(trial.distractor)
}
You can also play sound files from the file pool directly. Assuming that there is a file called bark.ogg in the file pool, you can play it like so:
pool['bark.ogg'].data.play()
The Canvas class: Presenting visual stimuli
New in OSWeb v1.4
The Canvas class is used to present visual stimuli. For example, you can show a fixation dot as follows:
var myCanvas = Canvas()
myCanvas.fixdot()
myCanvas.show()
A full overview of the Canvas class can be found here:
Available JavaScript libraries
New in OSWeb v1.4
Several convenient JavaScript libraries are bundled with OSWeb. These libraries are only available when running in a browser (and not on the desktop).
random-ext: advanced randomization
The random-ext library is available as random. This library provides many convenient, higher-level functions for randomization.
Example:
Draw eight circle with a random color and a location that is randomly sampled from a five by five grid:
// ECMA 6 (browser only)
let positions = xy_grid(5, 50)
positions = random.subArray(positions, 8)
const cnv = Canvas()
cnv.fixdot()
for (const [x, y] of positions) {
    cnv.circle({x: x, y: y, r: 20, fill: true, color: random.color()})
}
cnv.show()
For an overview, see:
pythonic: Python-like functions for iterating over arrays
The pythonic library provides Python-like functions for iterating over arrays. Available functions are: range(), enumerate(), items(), zip(), and zipLongest().
Example:
Draw a five by five grid of incrementing numbers:
// ECMA 6 (browser only)
let positions = xy_grid(5, 50)
const cnv = Canvas()
for (const [i, [x, y]] of enumerate(positions)) {
    cnv.text({text: i, x: x, y: y})
}
cnv.show()
For an overview, see:
color-convert: color conversion utilities
The color-convert library is available as convert. It provides convenient high level functions for converting from one color specification to another.
Example:
console.log('The RGB values for blue are ' + convert.keyword.rgb('blue'))
For an overview, see:
csv-parse: parse CSV-formatted text into an Object
The synchronous parse() function from the csv-parse library is available. This allows you to parse CSV-formatted text, for example from a CSV file in the file pool, into an Object.
Example:
const conditions = csvParse(
    pool['attentional-capture-jobs.csv'].data,
    {columns: true}
)
for (const trial of conditions) {
    console.log(trial.distractor)
}
For an overview, see:
Debugging
Most modern browsers, especially Chrome and Firefox, have a powerful built-in debugger. You can activate the debugger by adding a line that simply states debugger to your script (Figure 2).
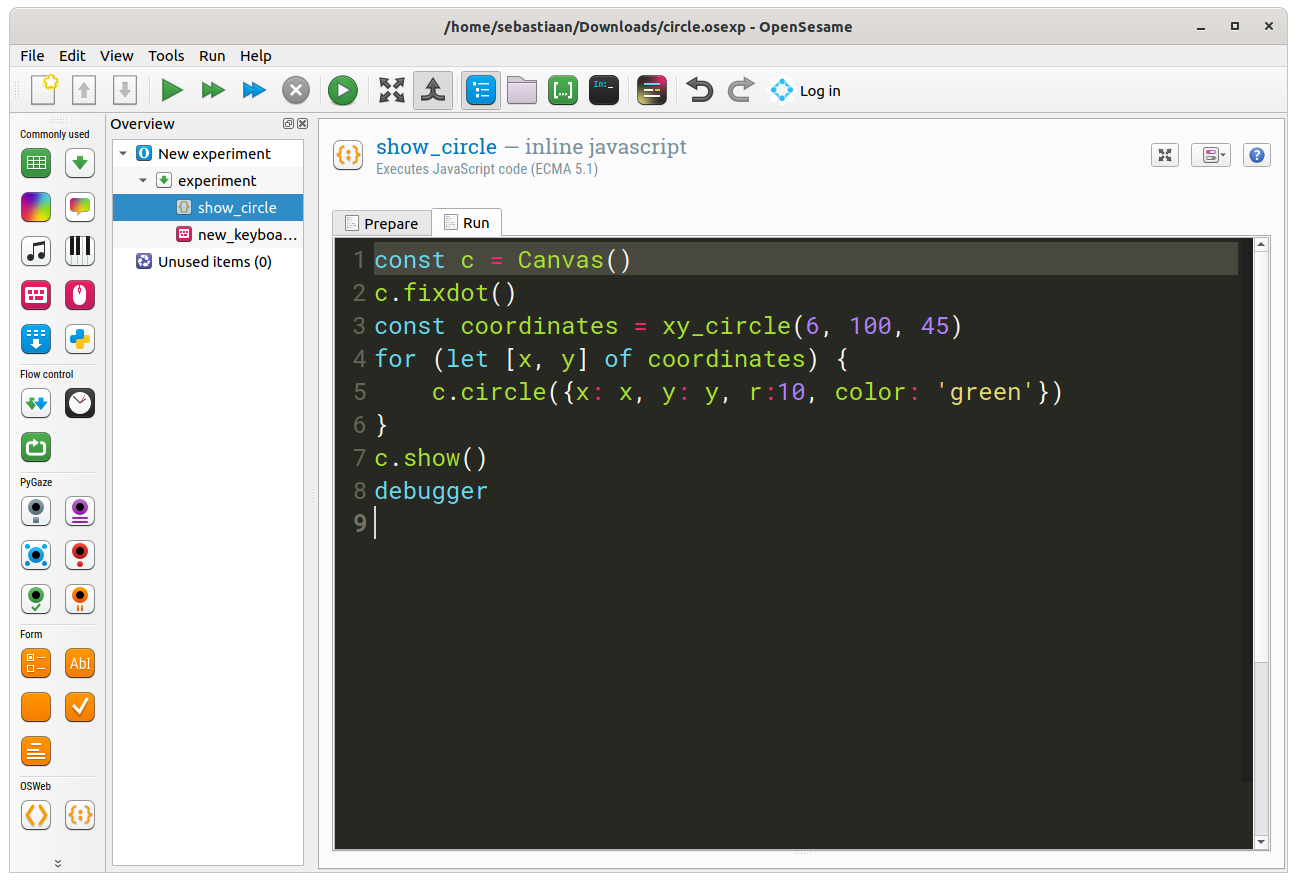
Figure 2. Activating the debugger from an inline_javascript item.
Then start the experiment and show the debugger (or: Dev tools in Chrome, or: Web Developer Tools in Firefox) as soon as the OSWeb welcome screen appears. The debugger will then pause the experiment when it encounters the debugger statement. At this point, you can use the Console to interact with the JavaScript workspace, or you can inspect variables using the Scope tool (Figure 3).
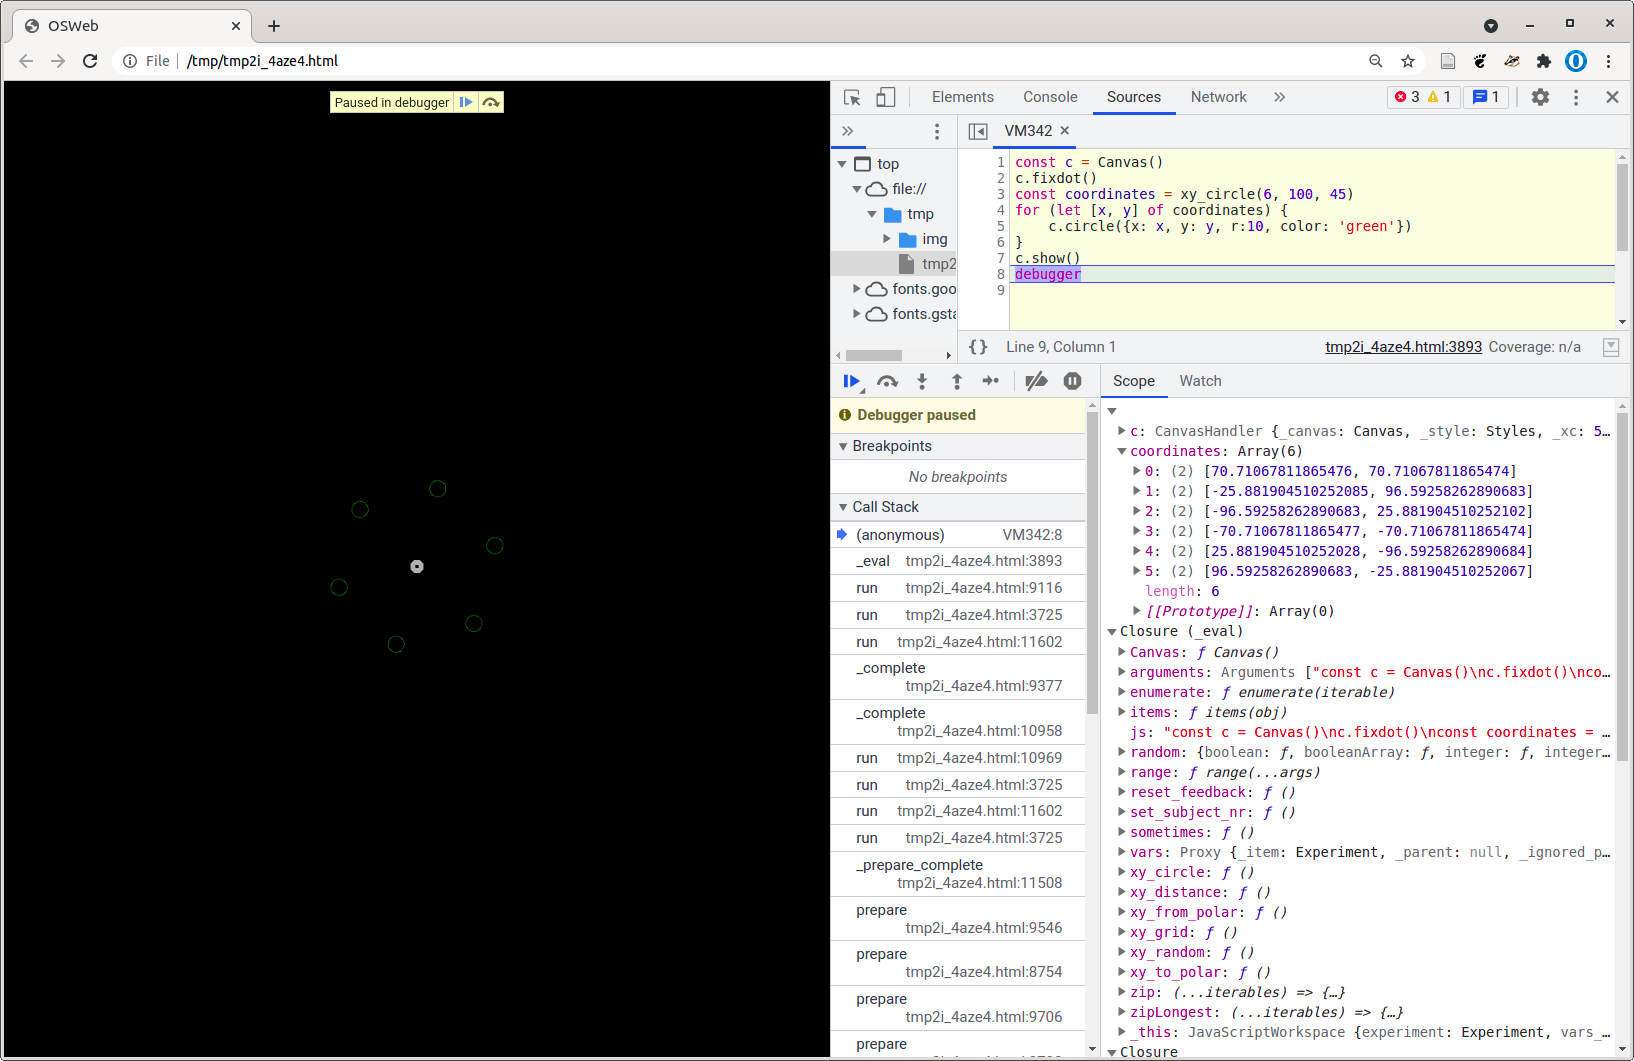
Figure 3. Inspecting the variable scope in Chrome.
See also: